Did you find a notice to “use persistent object cache” in your site health on your WordPress dashboard? Do you want to make your WordPress site more faster? the Redis Cache or Redis Object Cache is the solution.
Redis can be used as an object cache to speed up the performance of the WordPress site. Thus many hosting providers like Cloudways. WordPress also suggest using an Object cache like Redis and Memecache. But Redis is a faster and easier-to-use object cache solution for WordPress.
What is Redis Object Cache
Redis is a caching solution that caches and stores data in RAM(memory). It stores frequently accessed database queries in memory. Next time, if a request is made for the same data can then be served directly from Redis. This will eliminate the need to query the database again. This can significantly improve the speed and responsiveness of a WordPress site.
How to use Redis with WordPress
To use Redis in WordPress, we need a Redis server on our web server. After that, we can use the Redis Object Cache plugin on WordPress to use it.
1. Install Redis Server on Server/Hosting
Most managed hosting providers like Cloudways, Kinta, ServerAvatar and web hosting control panels like CyberPanel, CloudPanel etc already have Redis installed on their servers. You can contact your hosting provider to get more details.
If you are using a VPS or Dedicated server and want to use Redis with it then first you need to install Redis server on your hosting. Login to SSH/terminal as a root user and run the below command to install the Redis server on your web server.
To install Redis on the server, follow these steps –
Please these commands as per your server operating system.
A. Install Redis on Ubuntu/Debian:
sudo apt update
sudo apt install redis-server
B. Install Redis on CentOS:
sudo yum install epel-release
sudo yum install redis
C. Install Redis on Alpine Linux:
apk update
apk add redis
The first command will update your server package and the second command will install Redis on your server.
To verify that Redis is properly installed and running on your server, run sudo systemctl status redis in the SSH terminal. You will get “active (running)” in response same as shown in the below screenshot.

If you get “inactive” in response then run this one-line code to start the Redis server.
sudo systemctl start redis
Now. Redis is installed on your server and you can verify it by running sudo systemctl status redis and redis-cli command.
2. Install Redis Object Cache Plugin on WordPress
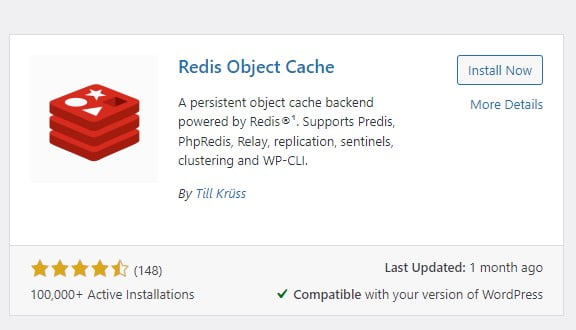
To use Redis on the WordPress site, we use a free Redis Object Cache plugin by Till Krüss.
Go to your WordPress dashboard, Plugin > Add New Plugin. Here you search the “Redis Object Cache” plugin and then install and activate it.
Note: If you are using Litespeed cache then you do not need this extra plugin. You can enable Redis in the Litespeed Cache plugin. Go to Litespeed Plugin Cache > Object Cache and enable it.
3. Configure the Redis Object Cache Plugin
After activating the Redis Object Cache plugin, you need to set up it and enable it. To do this, go to Settings > Redis. Here you will see the status of your Redis server.
If everything is fine then you will see the Redis: Reachable. Click on the “Enable Object Cache” button to enable Redis. Now you are done and no need to follow the steps.
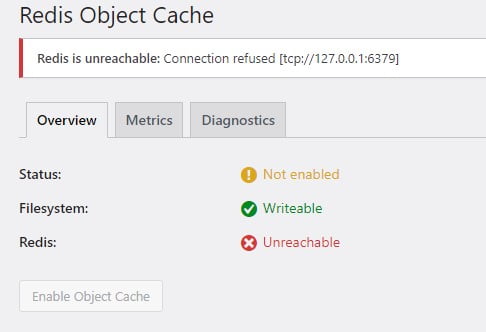
But in our case, our site is not reachable to the Redis server because our Redis is installed on a different port number and it requires a password. Contact your hosting provider to get this information.
How to add a Redis password and port number in WordPress:
By default, there is no option available to change the port number and password. so we need to add it manually in the wp-config file.
Open the file manager and add these two lines at the start (after <?PHP line) in the wp-config.php file. You can use the File Manager plugin to find and edit it.

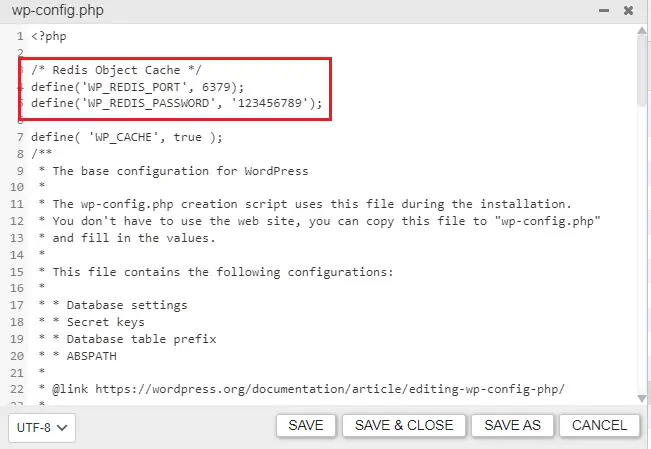
/* Redis Object Cache */
define('WP_REDIS_PORT', 6379);
define('WP_REDIS_PASSWORD', '123456789');Note: Please replace the port number and password with your own. Most in cases, the port will be 6379.
For cPanel users, you can find this information in the Redis option in your cPanel.
For ServerAvatar, you can find this information in Server Settings > Security Settings > Redis Password.
4. Enable Redis Object Cache
After adding the password and port number of the Redis server, go to Settings > Redis. Now you will see Redis: Reachable. This means your WordPress can connect with the Redis server.
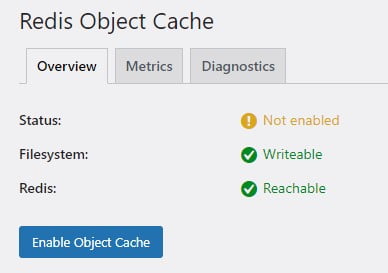
Now Click on the “Enable Object Cache” button to activate the Redis Object Cache.
Conclusion
Redis will improve the loading speed of your WordPress site. Redis is much faster than traditional databases because it stores data in memory instead of on disk. This makes it ideal for applications that require low latency.